To setup the menu go to WP Dashboard – Appearance – Menus.
You can visit WP.org tutorial for more detailed instructions – https://codex.wordpress.org/WordPress_Menu_User_Guide
There are 3 menu areas in the theme:
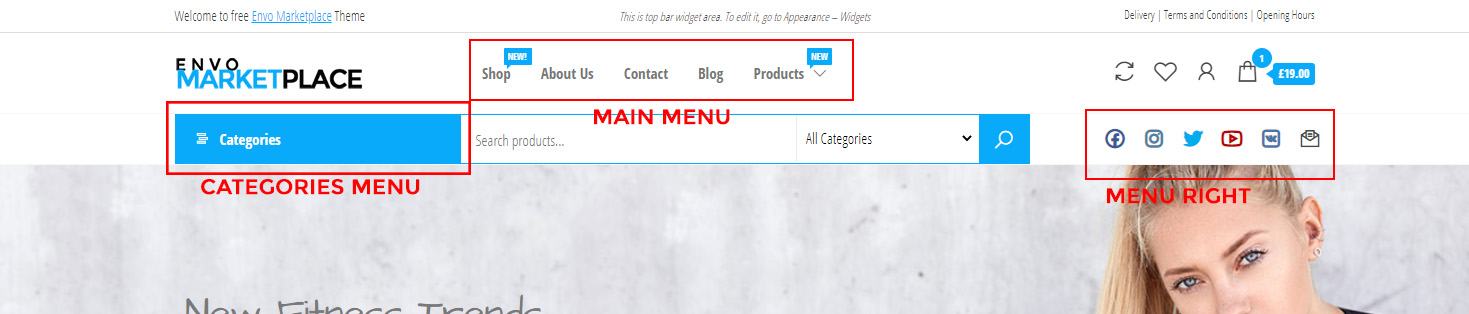
Categories Menu – (Word “Categories” can be translated, see the docs how to). If not set menu items, the WooCommerce categories are displayed by default. Enabled only with WooCommerce
Main Menu – Multi level menu. This menu is visible on mobile devices as off-canvas menu
Menu Right – 1 level menu (submenus are not allowed) – visible on mobile devices. Enabled only with WooCommerce
Social Icons
The theme automatically replaces links to popular social networks with icon equivalents.
Use “Custom link”, add the social page link and set the title. It should look similar to this:
![]()
Supported icons:
- dribbble
- Flickr
- Foursquare
- Google Plus
- Tumblr
- Vimeo
- WordPress.com
- WordPress.org
- YouTube
- Twitch
- Any mailto: link
- RSS feeds
- Search (put #search into the URL field)
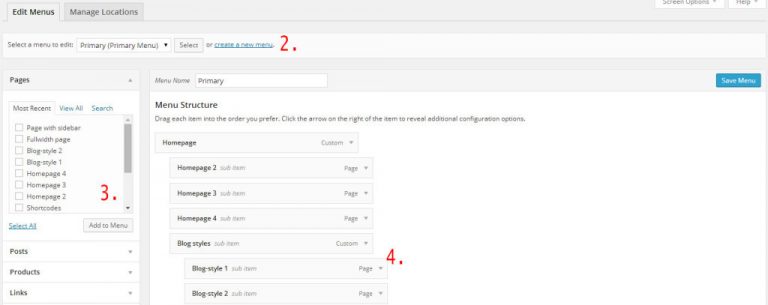
How to create Menu
- Create a new menu by adding a “Menu Name” and save the menu (2.).
- Proceed by adding Pages, Categories and Custom Links to the new menu (3.).
- Organize your menu by dragging and dropping the links to your desired locations (4.).
- Set the menu location under the menu area
- Make sure to save your changes when you are done.
PRO Version
This information covers only Envo Marketplace PRO features. Product Details - DemoTo edit colors and fonts of the menu, navigate to Customizer – Theme Options – Main Menu.
To enable sticky menu go to Customizer – Theme Options – Main Menu and switch to “Sticky menu” (Docs)
For more informations visit our documentation page